
 |
 |
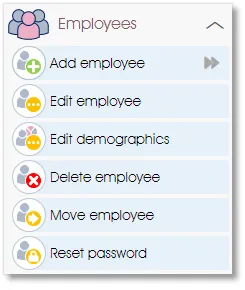
The Employees toolbox group in the side panel will allow you to add, edit, delete or move one or more employee records, or to reset the password(s) for one or more employees.
 |
Add – or drag and drop – an employee record to the selected business unit |
A new employee can be added in one of the following two ways:
- Click to add – select a business unit or an employee record with the mouse (it should be highlighted in burgundy), and then click on the Add employee toolbox function in the side panel or the dropdown toolbox; an employee record will be added to either the business unit that was selected, or to the business unit under which the selected employee falls.
- Drag and drop – click on the Add employee function and drag it to the desired location in the employee list.
A dialogue window where the employee’s details can be captured will be displayed: 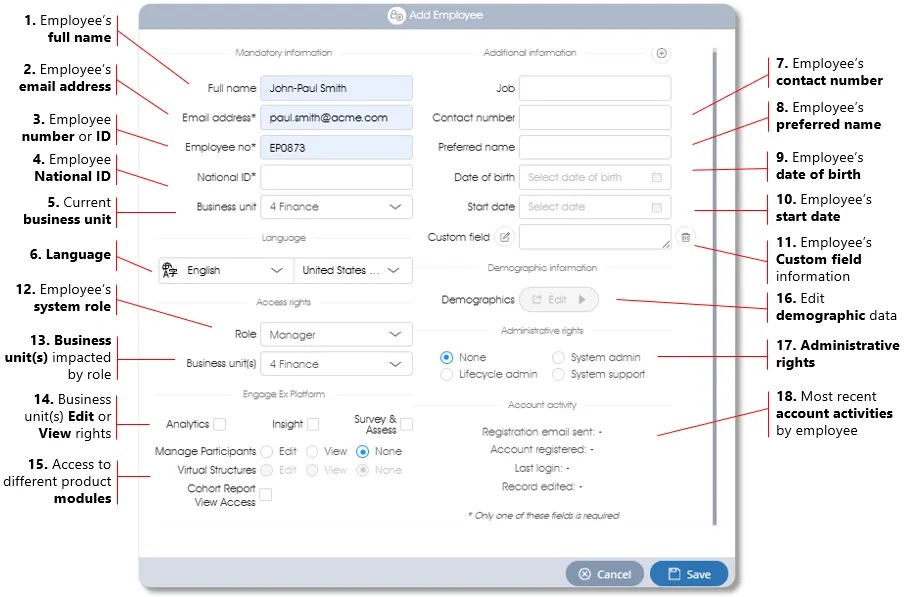
| 1. | Full name – mandatory (first or given name and surname). |
| 2. | Email address – a unique email address, or an employee number or a national ID is mandatory as it constitutes the employee's unique identifier. Please note that changing an employee's email address will invalidate their login account. This does not affect the employee's participation in surveys or assessments. Only logins to the Engage EX system (to view reports or make modifications, for example) will be impacted. The account will have to reactivated before the user is permitted to sign in, see user account activation for the process to be followed. |
| 3. | Employee no – email address, employee number (unique identifier) or national ID is mandatory. |
| 4. | National ID – email address, employee number or national ID (unique identifier) is mandatory. |
| 5. | Business unit – the current business unit index number under which the employee falls will be displayed; to select a different business unit, click on the dropdown field to open the employee list hierarchy to select a different business unit. |
| 6. | Language – click on the dropdowns to select the language and region or dialect; the default language for the client account will be shown by default. |
| 7. | Contact number – optional. |
| 8. | Preferred name – optional. |
| 9. | Date of birth – optional (click to open calendar). |
| 10. | Start date – optional (click to open calendar). |
| 11. | Custom field – optional (click ⊕ to the right of the Additional information heading to define). |
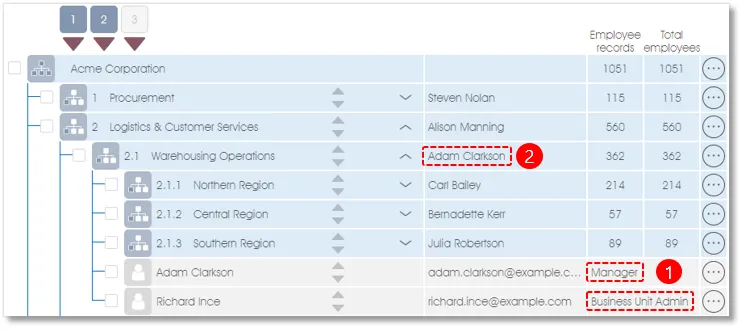
| 12. | Employee’s role – assign a system role to the employee; the role will be displayed as part of the employee record in the employee list (item 1 on the image below). Select a system role for the employee from the dropdown list. |
| Role | Description |
| Employee |
Default role for all newly added participants or employees |
| Manager |
Designate the employee as a Manager to view one or more business units (see 13. Business units) and their employee lists. Managers with Edit rights will be able to add or edit business units and employee details. The employee’s record does not have to reside in the business unit that he or she manages. Please note that a business unit may only have one Manager. The Manager’s name will be displayed next to the relevant business unit in the employee list (item 2 on the image below). |
| Business Unit Admin |
Provide the employee with administrative access to one or more business units (see 13. Business units). Business Unit Admins can have either Edit or View rights to the selected business units (see item 14. Edit or View), and can configure and run surveys if the Engage SURVEY product module has been selected (see item 15. Product modules). |
| 13. | Business units – assign one or more business units that the employee will either Manage or have Business Unit Admin rights to. Click on the dropdown field to open the employee list hierarchy, and select one or more business units by ticking the respective check boxes. The dropdown field will be updated with the index numbers of the business units that were selected.
Managers and Business Unit Admins can have either Edit or View rights to their selected business units (see 14. Edit or View). They will also be able to view the survey results, insights, and recommendations for the assigned business units via Engage ANALYTICS and Engage INSIGHT. |
| 14. | Edit or View – indicate whether the Manager and Business Unit Admin will have Edit or View rights to the selected business units. Edit rights will allow them to edit or update the business unit and employee list details of the assigned business units. |
| 15. | Product modules – select the product modules that the user can access when logged in. |
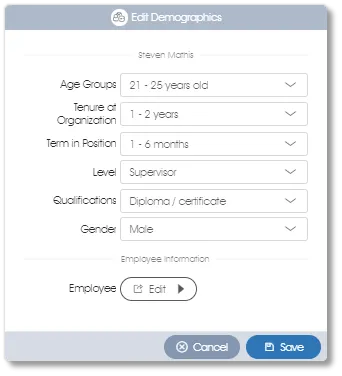
| 16. | Edit Demographics – click on the button to edit the demographic attributes of the employee. |
| 17. | Administrative Rights – select System Admin to provide someone with full, unrestricted access to all the Survey and Assessment product modules and Lifecycle Admin for the Lifecycle product modules, including the right to assign System Admin roles to other users; and select System Support to provide someone with similar rights except for the right to assign System Admin roles to others. |
| 18. | Account Activities – show the date and time when a registration email was sent to the user, when the user activated the account, and the last time the user accessed the account (logged in). |
 |
Edit the selected employee record |
Select an employee record with your mouse (it should be highlighted in burgundy), and then click on the Edit employee toolbox function in the side panel or in the toolbox dropdown menu. Alternatively, just double-click on the employee record to edit it. A dialogue window where the employee record details can be edited will come up (see Add employee above for more).
 |
Edit the selected employee’s demographic data |
This function will allow you to edit the demographic data (if available) of an employee. Select an employee record with your mouse (it should be highlighted in burgundy), and then click on the Edit demographics toolbox function in the side panel or in the toolbox dropdown menu. A dialogue window where the employee’s demographic details can be edited will come up.
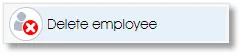 |
Delete the selected employee record(s) |
Select an employee record with your mouse (it should be highlighted in burgundy), and then click on the Delete employee toolbox function in the side panel or in the toolbox dropdown menu. A warning message will be displayed, asking you to confirm that you want to permanently delete the employee’s record. Note that the survey responses of employees who have been deleted will not be deleted from a survey – their responses will remain part of any survey that they have participated in.
The Delete employee function will also work if you have selected multiple employees by ticking their checkboxes, or if you have selected one or more business units.
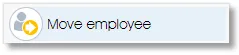 |
Move the selected employee(s) to a different business unit |
Select an employee record with your mouse (it should be highlighted in burgundy), and then click on the Move employee toolbox function in the side panel or in the toolbox dropdown menu. A dialogue window will be displayed. Click on the Business unit dropdown and select the destination business unit from the employee list hierarchy.
The Move employee function will also work if you have selected multiple employees by ticking their checkboxes, or if you have selected one or more business units.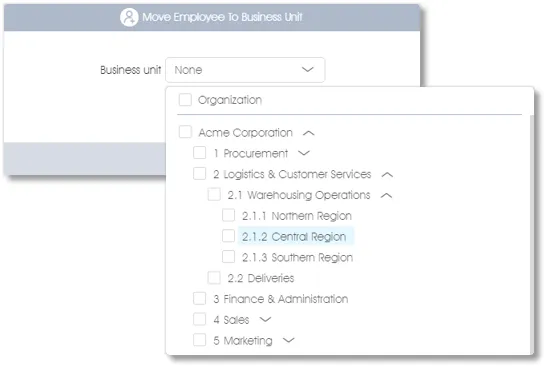
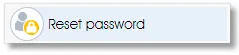 |
Reset the password of the selected employee(s) |
Select an employee record with your mouse (it should be highlighted in burgundy), and then click on the Reset password toolbox function in the side panel or in the toolbox dropdown menu. The email address of the selected employee will be displayed. Please confirm that it is a valid email address before clicking on the Send reset email button – a system-generated email with the reset password link will automatically be sent to the email address as shown.
Please note that an Account no longer exists... error message will be displayed if Reset password is attempted for a user account that has been invalidated by editing the email address. The account will have to reactivated, see user account activation for the process to be followed.
The Reset password function will also work if you have selected multiple employees by ticking their checkboxes, or if you have selected one or more business units; system-generated emails with reset links will be emailed to all selected employees.
| For more information, click on a sub-menu item at the top of the page⇑ or in the right margin⇒ |