
The Define Survey module of Engage SURVEY will allow you to create any number of diagnostic or pulse survey campaigns based on a combination of a survey model, a diagnostic or pulse survey questionnaire, survey participants, and survey campaign settings.
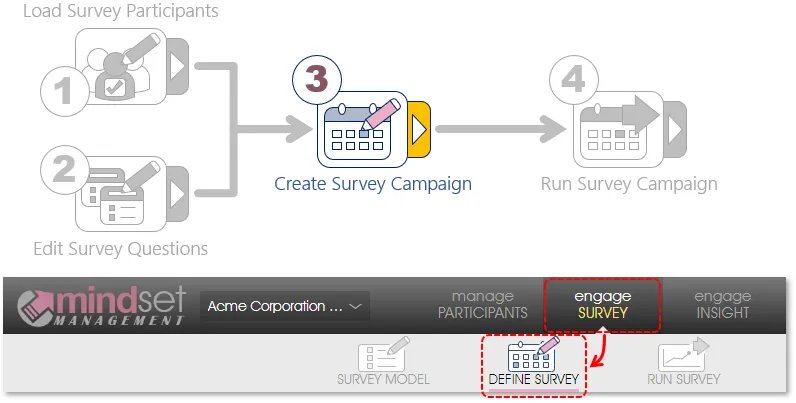
Elements of a Diagnostic or Pulse Survey Campaign
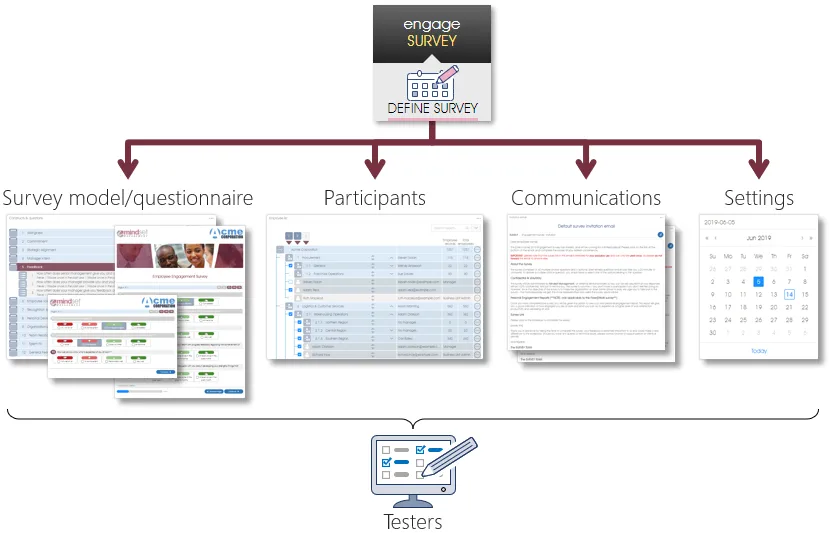
A survey campaign – whether a regular 6-monthly or annual employee survey, or a series of short pulse surveys – comprises the following key ingredients:
- Survey model & questionnaire – survey model (survey questions grouped into one or more survey constructs) and related online diagnostic or pulse survey questionnaire;
- Participants – either all the participants in the employee list, as captured using the Manage PARTICIPANTS module or as included in a virtual structure, or any arbitrary subset of the employee list (individual employees and/or business units), or the survey can be run using a public (open) link that anyone can respond to;
- Communications – edited version of the inherited invitation and reminder email content;
- Survey settings – settings to control key aspects of the survey process as well as start, reminder and end dates for the survey campaign; and
- Test emails – survey links sent out via test emails so selected individuals can test and validate the survey before it goes live.
Defining a Survey Campaign to be coordinated via Microsoft Teams
Additional preparations, over and above the standard survey campaign arrangements, must be made if a survey campaign is to be coordinated via Microsoft TEAMS or is planned to include a combination of email and TEAMS participants. These additional preparatory measures are listed here and references to more detailed explanations are provided where necessary.
Mindset Client Profile Updates
Before a survey that includes TEAMS participants can be defined, the client's Mindset Client Profile must be updated to include the client's Microsoft Tenant ID, obtainable from the client's LAN administration staff. Normally, this update will be done by the client's Mindset Partner.
TEAMS specific Survey Setting
The Send survey links via Teams setting must be set to Yes before the survey is launched, if the survey is to utilize TEAMS invitation and reminder messages. If the client's Mindset Client Profile does not yet contain a Microsoft Tenant ID the Send survey links via Teams setting cannot be set as it will not be displayed. Find a detailed explanation in the survey settings section.
Engage EX TEAMS app
Before launching a survey campaign that will include TEAMS participants, the LAN administrators or technicians responsible for maintaining the client's Microsoft TEAMS installation will be asked to:
- Ensure that all employees who are to participate via TEAMS have valid entries in Microsoft Entra.
- Propagate the Engage EX TEAMS app into the TEAMS instances of all prospective participants. Please note that this can be a very time-consuming exercise depending on: (1) the number of prospective participants and (2) the speeds and configuration parameters of all platforms involved.
Defining a Diagnostic or Pulse Survey Campaign
The Define Survey menu item will allow you to create a new survey campaign (combination of a survey model/questionnaire, survey participants and survey communications), or to edit, copy or delete an existing survey campaign.
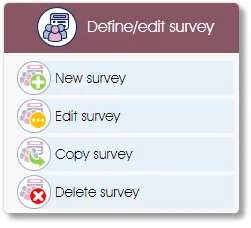
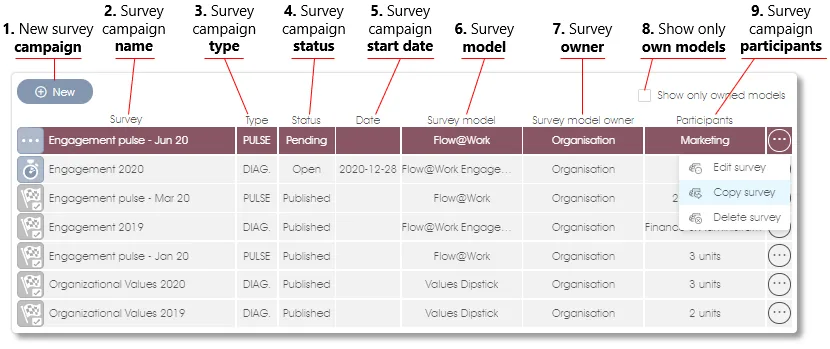
A list of existing survey campaigns will be displayed in the work area. Click on the New button to create a new survey campaign, or select an existing survey campaign from the list (it should be highlighted in burgundy), and then click on the appropriate toolbox function in the side panel or in the toolbox dropdown menu to edit or copy the survey campaign. The Delete survey option will only be available if the survey campaign has not yet been launched.
 |
Create a new survey campaign |
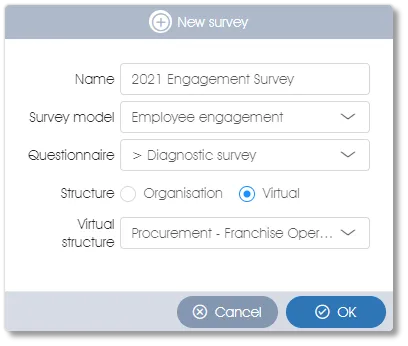
Click on the New survey toolbox function in the side panel or on the New button in the work area to create a new survey campaign. A dialogue window will open where you can enter the name of the survey campaign and select the survey model and related questionnaire. Click on the OK button when you are done. Select the Virtual Structure option to create a survey campaign based on a previously created virtual structure, and select the virtual structure from the list provided in the dropdown field. See the Virtual Structures section for more on this.
The new survey campaign will be created, and the Edit survey work area and a number of sub-menu items in the side panel will be displayed:
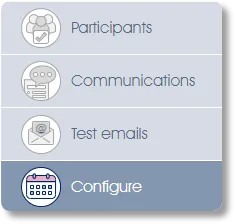
- Configure – set or change the survey model and questionnaire, and set the survey start, reminder, and closure dates (see Edit Survey Campaign for more on this);
- Participants – select the survey participants from the employee list (see Select Survey Participants for more on this), unless you want to run the survey on a public (open) link that anyone can respond to;
- Communications – edit and finalize the survey invitation and reminder email contents (see Survey Communications for more);
- Test emails – send test emails containing the survey link to selected individuals (see Managing test emails for more).
 |
Edit an existing survey campaign |
To edit the parameters and settings of an existing survey campaign, select the survey campaign (it should be highlighted in burgundy), and then click on the Edit survey toolbox function in the side panel or in the toolbox dropdown menu. Alternatively, just double-click on the survey campaign name to edit it; the Edit survey work area and a number of sub-menu items in the side panel will be displayed (see the New survey section above for more).
 |
Copy an existing survey campaign |
To copy an existing survey campaign, select the survey campaign (it should be highlighted in burgundy), and then click on the Copy survey toolbox function in the side panel or in the toolbox dropdown menu. A dialogue window to confirm the copying of the survey campaign will open. Click the OK button to save the survey campaign. An iteration number (#1) will be added to the name of the new survey campaign. You can edit or rename the survey campaign via the Edit survey function.
 |
Delete an existing survey campaign |
Select a survey campaign (it should be highlighted in burgundy), and then click on the Delete survey toolbox function in the side menu or in the toolbox dropdown menu in the work area. A dialogue window to confirm the deletion of the survey campaign will open. Click the OK button to delete the survey model. Please note that an active survey campaign cannot be deleted.
| For more information, click on a sub-menu item at the top of the page⇑ or in the right margin⇒ |