
The Demographics menu item in the side panel will allow you to:
- Define or import demographic categories for use in an employee survey;
- Edit, copy, and maintain the demographic categories; and
- Delete demographic categories where required.
See Demographic Data for some guidelines regarding the use of demographic data.
 |
 |
Associating demographic data to individual employees as part of a survey will allow you to segment and filter survey responses based on demographic attributes, e.g. gender or tenure. This will make it easier to isolate issues so interventions can be properly targeted. The use of demographic data with a survey is however optional – diagnostic or pulse surveys can be conducted without the need to include any demographic data, e.g. to conduct a customer satisfaction survey.
When creating a survey campaign by means of the Define Survey function, you will have different ways of including some or all of the demographic categories:
- No demographic data captured – if you haven’t captured or imported any demographic data for the employees in the employee list, you can include demographic questions in the survey questionnaire as a means to collect the respondents’ demographic data. To do this, however, you will have to define the required demographic categories and their respective options/attributes so the respondents can select the attributes from the dropdown lists.
- Demographic data captured – if you have imported or captured demographic data for your employees, you can include the demographic data in the survey results to enable demographic segmentations and filtering in the analytics dashboard. Since the data has already been captured, you won’t have to include and demographic questions in the survey questionnaire.
- Using a survey to update demographic data – you can also use a survey as a means to update existing demographic data by including them in the survey questionnaire, e.g. to get the survey respondents to update their age groups.
 |
Import demographic categories from an Excel file |
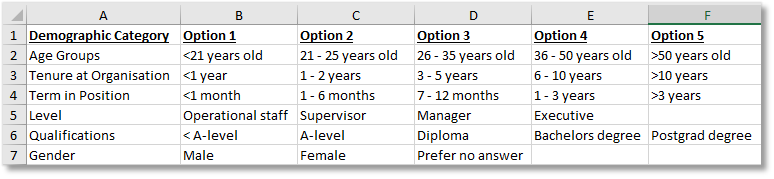
To import demographic categories and their options via an Excel file, the Excel file must be prepared and formatted as outlined below:
- The import file must be a native Excel file with a *.xlsx file extension.
- The first row is reserved for column headings, but headings are optional – they can be left blank if required.
- The first column is reserved for the demographic category (e.g. Age Group, Tenure). Please make sure that the demographic categories are unique.
- Subsequent columns are used for the demographic category’s options/attributes (e.g. <21 years old, 21 – 25 years old). The demographic categories should have at least 2 options/attributes each.
- There are no logical limit to the number of options/attributes per demographic category. For instance, a demographic called ‘Direct manager’ could have the names of all 336 managers as the options/attributes. This will make it possible to set a demographic filter in the analytics dashboard to view the survey results of all employees who report to a particular manager.
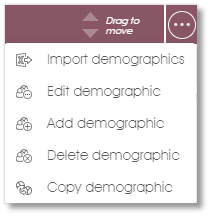
Once the Excel file has been prepared with the necessary columns, the data can now be imported. To get started with the process, click on the Import demographics toolbox function in the side panel or dropdown toolbox. Select the Excel file to be imported by clicking in the square box to open a File Open dialogue window and to select the Excel file to be imported, or drag the file into the square box with your mouse.
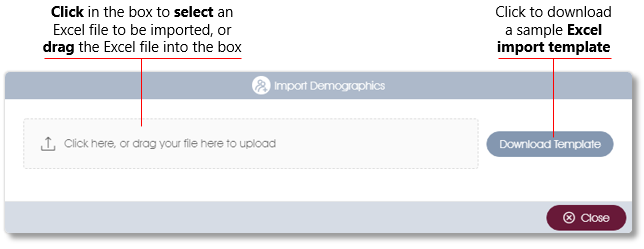
Note: you can download an empty Excel import template file with the required column headings by clicking on the Download template button. The Excel file will be opened and the following information and options will be displayed:
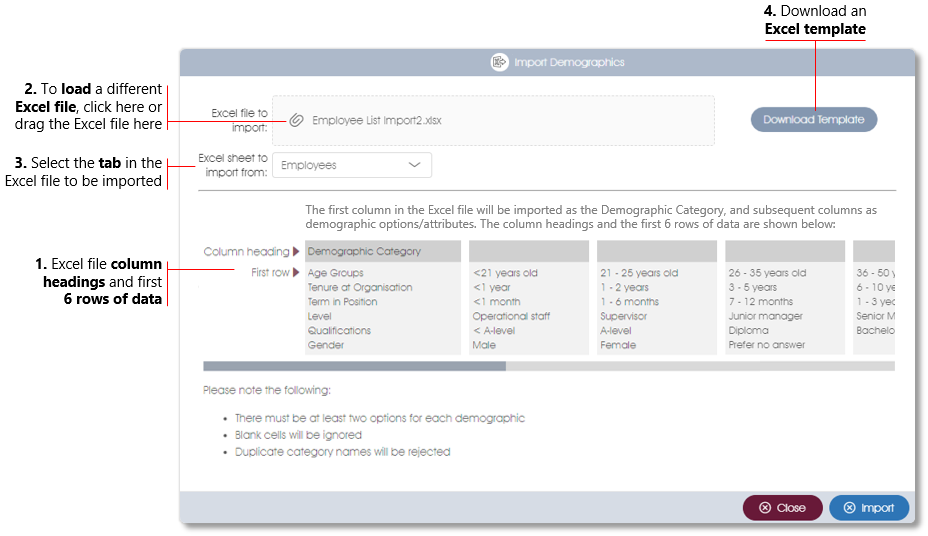
| 1. | Excel column headings & data – the column headings of the Excel file will be displayed, and beneath them the first 6 rows of data. If required, use the scroll bar to scroll to the right to view the rest of the Excel columns. |
| 2. | Excel file name – the name of the Excel file that is to be imported will be displayed in the box. Click on the box to select and load a different Excel file, or drag the Excel file into the box. |
| 3. | Select the Excel tab – click on the dropdown to select the Excel tab that should be loaded (if the Excel file has more than one tab with data). |
| 4. | Download template – click to download an Excel file with suggested column headings. |
Click on the Import button to start the import. After a successful import, the total number of demographic categories that were imported will be displayed.
 |
Add a demographic category |
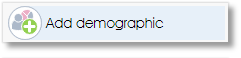
To add a demographic category, click on the Add demographic toolbox function in the side panel or in the toolbox dropdown menu. A dialogue window will be displayed:
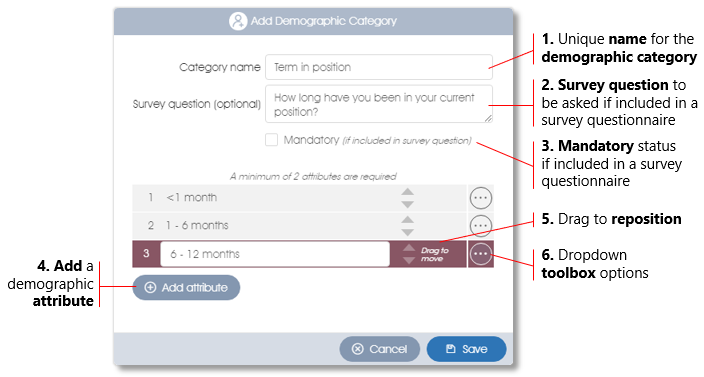
| 1. | Category name – enter a unique name for the demographic category. |
| 2. | Survey question – define a question for the demographic category if you plan to include it at some point as a question in a survey questionnaire. |
| 3. | Mandatory – indicate whether the demographic question should be mandatory or optional if you plan to include it in a survey questionnaire. |
| 4. | Add attribute – click to add another demographic attribute. |
| 5. | Drag to move – drag the demographic attribute with your mouse to reposition it. |
| 6. | Toolbox options – available toolbox functions. |
 |
Edit a demographic category |
Select a demographic category with your mouse (it should be highlighted in burgundy), and then click on the Edit demographic toolbox function in the side panel or in the toolbox dropdown menu. Alternatively, just double-click on the demographic category to edit it. A dialogue window with the demographic category’s parameters will be displayed (see Add demographic above for more).
 |
Delete a demographic category (provided no demographic data has been captured for this category) |
Select a demographic category with your mouse (it should be highlighted in burgundy), and then click on the Delete demographic toolbox function in the side panel or in the toolbox dropdown menu.
Please note that you will not be able to delete a demographic category if any data has been captured for the particular category. If no demographic data has been captured for this category and you are allowed to delete the demographic category, a dialogue window with a warning message will be displayed, asking you to confirm that you do want to delete the selected demographic category.
 |
Copy a demographic category |
Select a demographic category with your mouse (it should be highlighted in burgundy), and then click on the Copy demographic toolbox function in the side panel or in the toolbox dropdown menu. The demographic category will be copied and a new category created with the same category name and a "#1" extension. A dialogue window with the demographic category’s parameters will be displayed, allowing you to change the category name or attributes (see Add demographic above for more).
| For more information, click on a sub-menu item at the top of the page⇑ or in the right margin⇒ |