
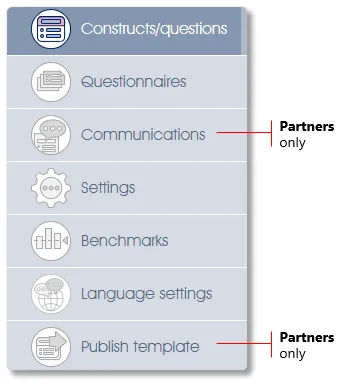
Selecting the New assessment or Edit assessment toolbox functions will result in the assessment model work area and a number of sub-menu items in the side panel being displayed. The Constructs/questions sub-menu item will allow you to import, define or edit assessment constructs (themes or topics) and their related assessment questions.
Importing or Exporting a Model via Excel
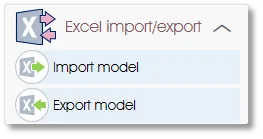
The Excel import/export toolbox group in the side panel will allow you to export the current model to Excel, or to import constructs and questions from an Excel file into the current model.
 |
Import constructs and questions into the current model |
To import constructs and/or questions via an Excel file, the file must be structured with columns in the right sequence and with cogent column headings. The system will allow you to map any column to a specific field during the importing process, so you can use your own column headings. However, using the prescribed column heading text will result in columns being automatically mapped to the relevant field, which will simplify the importing process.
Structuring an Excel Import File
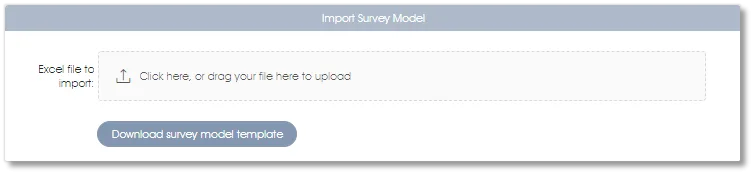
Download an Excel import template with the prescribed column headings by selecting the Import model toolbox function in the side panel and then clicking on the Download survey model template button:
The purpose and use of the different Excel columns are described below:
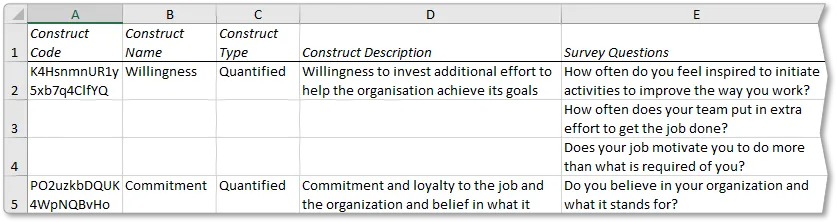
| A. | Construct Code (optional) – this column will be omitted unless you are working with Engaged@Way-of-Work or Inclusion@Way-of-Work constructs. Including the unique codes of these indicator constructs enables the display of the Engagement and/or Inclusion indicator panels in the analytics dashboard (see Indicator Analytics for more). |
| B. | Construct Name – a short descriptive name for the construct; the image in (D) below shows how it will be displayed in the analytics dashboard. |
| C. | Construct Type – enter one of the following construct types: • Quantified – combine and average the scores of all Likert and dropdown questions • Non-quantified – include NPS and other questions that will not be averaged (see NPS questions). (See Add Construct for additional information). |
| D. | Construct Description – a short description of the construct (10 - 15 words); the image below shows how it will be displayed in the analytics dashboard.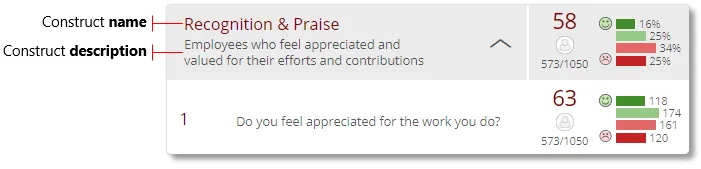 |
| E. | Survey Questions – question text, either as a statement or as a question with a question mark. |
| F. | Question Code (optional) – this column will be omitted unless you are working with Engaged@Way-of-Work or Inclusion@Way-of-Work questions. Including the unique codes of these questions enables the inclusion of the questions' benchmark scores in the analytics dashboard (see Indicator Analytics for more). |
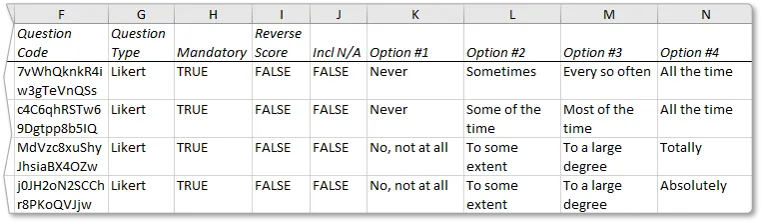
| G. | Question Type – enter one of the following question types: • Likert – single-option, multiple choice (Likert) question (see Likert questions). • Dropdown – single-option dropdown question (see Dropdown questions). • NPS – net promoter score question (see NPS questions). • Open-ended – comment-type (qualitative) question (see Open-ended questions). • Multiple-choice – multiple-option, multiple choice question (see Multiple-choice questions). • Employee select – employee selector type question (see Employee select for more). (See Adding or Editing Questions for additional information). |
| H. | Mandatory – insert TRUE if the question should be treated as a mandatory question in the online questionnaire. |
| I. | Reverse Score – insert TRUE if the question should be reversed-scored in the analytics dashboard. |
| J. | Include N/A – insert TRUE if a not-applicable (N/A) option should be included for the question in the online questionnaire. |
| K. | Option #1 – text for the first multiple-choice or NPS question option - leave blank in case of an open-ended question. (See NPS questions or Multiple-choice questions for more). |
| L. | Option #2 and more – text for subsequent multiple-choice question options or leave blank. |
Selecting and Importing an Excel File
Click on the Import model toolbox function in the side panel. A dialogue window will open where you can select an Excel file to be imported. Click in the square box to open a File Open dialogue window in which you can select the Excel file to be imported, or drag and drop the file into the square box. Note: you can download an empty Excel import template file with the required column headings by clicking on the Download survey model template button.

An Excel import dialogue will come up:
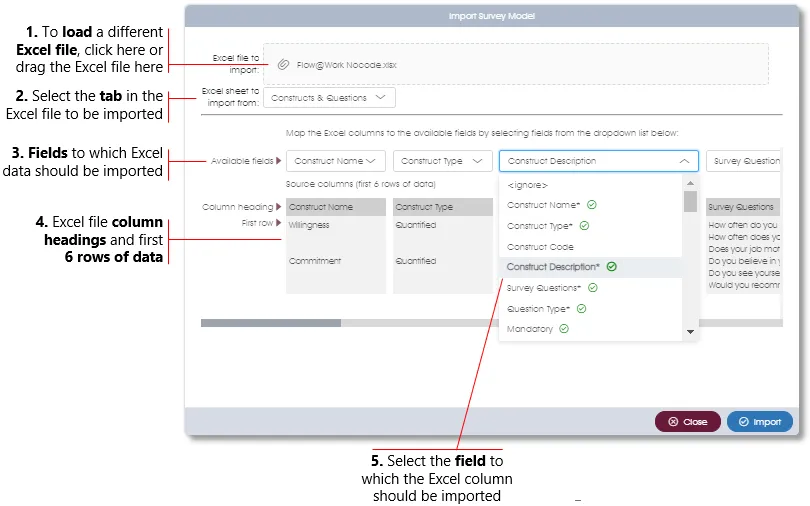
| 1. | Excel file name – the name of the Excel file that is to be imported will be displayed in the box. Click on the box to select and load a different Excel file or drag the Excel file into the box. |
| 2. | Select the Excel tab – select the Excel tab that should be loaded (if the Excel file has more than one tab containing data). |
| 3. | Map fields for importing – map the Excel columns to corresponding fields by selecting a data field from the dropdown for each of the Excel columns. The system will automatically match the Excel column headings to data fields if certain predetermined column headings were used, e.g. a column with the heading ‘Construct Name’ will automatically be mapped to the Construct Name field. |
| 4. | Excel column headings & data – the column headings of the Excel file will be displayed, and beneath them the first 6 rows of data. If required, use the scroll bar to scroll to the right to view the rest of the Excel columns. |
| 5. | Selecting fields – fields that have already been selected for mapping will be marked with a green tick mark. Mandatory fields for each of the content types will be marked with an Asterisk – see the image below. To ignore a field, simply select the <Ignore> option. |
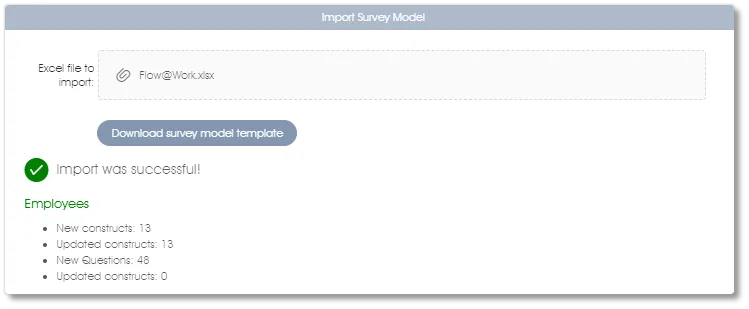
When you are done, click on the Import button to import the model. If successful, statistics regarding the number of constructs and questions that were imported will be displayed. If the Excel file contains any errors, the import will be suspended and an error message with a Download error file button will be displayed. Click on the button to download an Excel file with the cells that contain errors flagged in red. Fix the errors and retry the import.
Importing Engagement or Inclusion Indicator Constructs
The Engaged@Way-of-Work or Inclusion@Way-of-Work indicator constructs can be included in a custom survey if you would like to display the Engaged@Way-of-Work or Inclusion@Way-of-Work indicator panels as part of a custom survey's analytics dashboard (see Indicator Analytics for more).
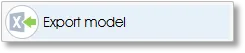 |
Export the questions of the current model to Excel |
The Export model toolbox function will export the current model's constructs and questions into an Excel file, where the questions can be manipulated, edited and reimported via the Import model toolbox function if required.
Renaming a Model
The model's name is displayed in the upper left corner of the work area. The model can be renamed by clicking the rename icon to the right of the model name, modifying the name as required, then clicking the blue-circled tick to save the modifications, or the burgundy-circled cross to cancel them.
Translating a Model
Respondents who may be unable to participate in the assessment or, at best, provide unreliable responses because they are unfamiliar with the language in which it was constructed can be provided for by translating the model and its associated questionnaire(s). This process is the subject of the Associating Languages with Models section.
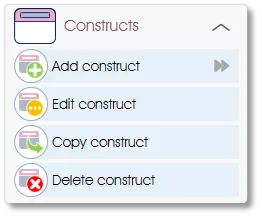
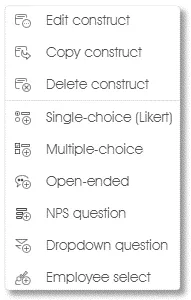
Adding or Editing Model Constructs
The Constructs toolbox group in the side panel will allow you to add, edit, copy, or delete a construct (theme). .
 |
|
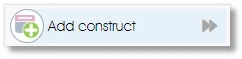 |
Add – or drag and drop – a construct (theme) to a model as a container to group related questions |
Questions should always be grouped into containers or constructs based on their themes. To add a construct as a container for a number of related questions click on the Add construct toolbox function in the side panel or click and drag the Add construct toolbox function from the side panel and drop it on the construct below which you would like to add the construct.
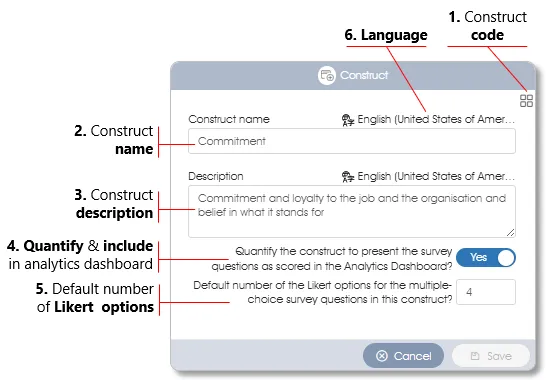
| 1. | Construct Code – click on the icon to view or edit the unique code for the construct. Construct Codes can, inter alia, be used to display indicator panels in the analytics dashboard (see Indicator Analytics for more). |
| 2. | Construct name – enter a name for the construct. |
| 3. | Description – type in a short description for the construct that will be used in the Engage ANALYTICS dashboard to describe the construct. |
| 4. | Quantify and include – select this option to quantify the responses of the construct's questions. The scores of all single-choice (Likert) and/or dropdown questions will be averaged and shown as a score in the Engage ANALYTICS dashboard. Single-choice (Likert) or dropdown questions will be averaged regardless of the number of Likert options. Please note that NPS questions cannot be added to a quantified construct (see NPS questions). |
| 5. | Default number of Likert options – enter the default number of Likert options for all single-choice (Likert) questions that will be added to this construct. You will still be able to add questions with a different number of single-choice (Likert) options but, when adding a new question, the dialog box will automatically contain the number of Likert options specified here. |
| 6. | Language - the language of this construct. Model constructs and questions are created in a default language (usually English - United States of America) and may have versions in additional languages (see Translating Questions and Constructs for more on this). |
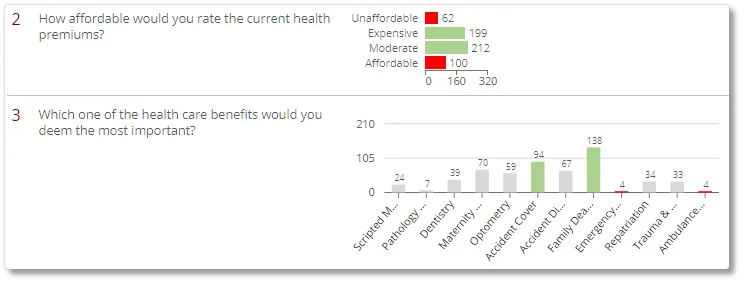
Multiple-choice and dropdown questions that are included in a non-quantified construct will not be added up or averaged and will be shown as illustrated below in the Engage ANALYTICS dashboard.
 |
Edit the parameters of an existing model construct |
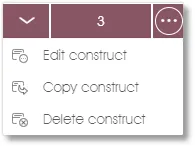
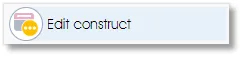
Select a construct (it will be highlighted in burgundy), and then click on the Edit construct toolbox function in the side panel or in the toolbox dropdown menu in the work area. Alternatively, just double-click on the construct name to edit it. A dialogue window similar to the one that opened when you created a new construct (see previous point) will open. Change the parameters as required and click on the Save button to save the changes and close the dialogue.
 |
Copy an existing model construct and all its related questions |
Select a construct (it should be highlighted in burgundy), and then click on the Copy construct toolbox function in the side panel or in the toolbox dropdown menu in the work area. A dialogue window where you can confirm the copying of the construct will open. Click on the OK button to save the construct. An iteration number (#1) will be added to the name of the new construct.
 |
Delete an existing model construct and its questions |
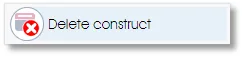
Select a construct (it should be highlighted in burgundy), and then click on the Delete construct toolbox function in the side panel or in the toolbox dropdown menu in the work area. A dialogue window where you will be required to confirm the deletion of the construct will open. Click on the OK button to delete the construct.
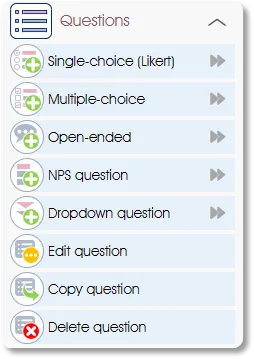
Adding or Editing Model Questions
The Questions toolbox group in the side panel will allow you to add, edit, copy, or delete questions.
|
|
|
 |
Add – or drag and drop – a single-choice (Likert) question to a model construct |
Single-choice (Likert) question options will be displayed with radio buttons in a questionnaire and will allow respondents to select only a single option in response to the question.

Responses to single-choice Likert questions can be quantified and combined with other similar questions to calculate the average score for a construct in the analytics dashboard. To add a single-choice Likert question to a construct, select the destination construct and then click on the Single-choice (Likert) toolbox function in the side panel or in the construct’s toolbox dropdown menu. Alternatively, click and drag the Single-choice (Likert) toolbox function from the side panel and drop it on the construct where you would like to add the question.
Please note that the system assumes that the Likert choices/options (Strongly disagree, Disagree ... Strongly agree) are arranged in the order displayed in the image above, ie, that the least desirable outcome is listed as the first choice and the other choices are listed in the order of increasing desirability. The system quantifies the responses, assigning the lowest value to the first choice and increasing values to the remaining choices.
If the choices are arranged in the reverse sequence, ie, most to least desirable, ensure that Reverse scores (see point 2 below) is checked for the question. This will ensure that Engage Analytics and/or other reports respond correctly to the non-default question definition.
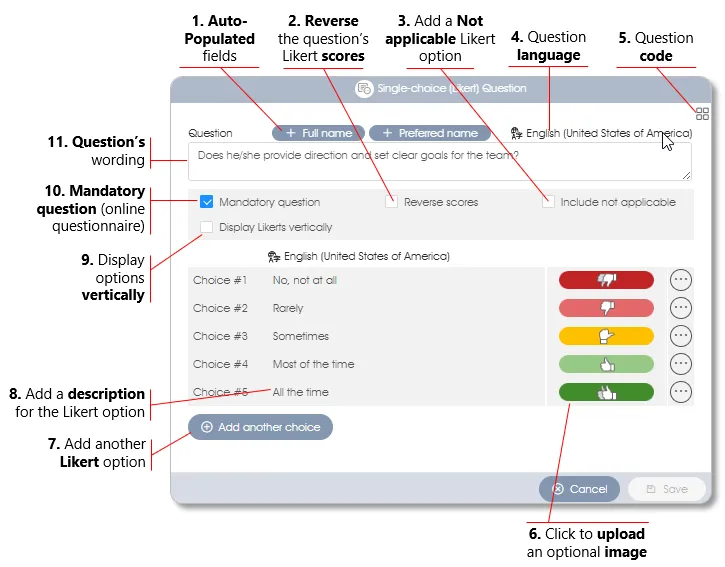
A single-choice (Likert) question with a number of Likert options as defined via the Default number of Likert options setting for the construct will be added (see Add construct for more on this). A dialogue window with the following options will be displayed:
| 1. | Auto-populated fields (customization aids for assessments only) - inserted where required these fields can be used to customize assessment questionnaires as they are automatically substituted with relevant information (eg. the assessee's name) when the questionnaire is presented (see Auto-populated fields for more). |
| 2. | Reverse scores – reverse the scores of the Likert options/choices in the analytics dashboard. This option must be selected when the Likert choices are arranged in most to least desirable sequence (see the paragraph describing sequencing of Likert choices above). |
| 3. | Add not applicable – select to add a Not applicable option to the question. Not applicable responses will not be quantified or included when calculating the construct’s average score in the analytics dashboard. |
| 4. | Question language - the language of this question. Models are created in a default language (usually English - United States of America) and may have versions in additional languages (see Translating Questions and Constructs for more on this). |
| 5. | Question code – click on the icon to view or edit the unique code for the question. Question Codes can, inter alia, be used to link the question to a benchmark score where available (see Indicator Analytics for more). |
| 6. | Upload image – add an optional image to the new Likert option. The default Likert images, as defined in the Settings for the model, will be used as images for the different Likert options and can be edited as required. The images can also be auto-updated in bulk via the Settings function. |
| 7. | Add another Likert option – click on the button to add another Likert option to the question. |
| 8. | Likert description – add a short description for the Likert option which has been added by clicking the Add another choice button. The default Likert text as defined in the Settings for the model will be used as descriptions for the different Likert options and can be edited as required. |
| 9. | Display Likerts vertically - if selected, the Likert options will be arranged vertically on the questionnaire. The default layout for Likert options is horizontal, see the image above (at the top of this section). |
| 10. | Mandatory question – indicate whether a question should be mandatory (compulsory) in the online questionnaire. |
| 11. | Question – type in the wording of the single-choice question either as a statement or a question with a question mark. |
 |
Add – or drag and drop – a multiple-choice question to a non-quantified model construct |
Multiple-choice question options will be displayed with checkboxes in a questionnaire and will allow respondents to select more than one option in response to the question. Please note that multiple-choice questions will not be quantified and can only be added to a non-quantified construct - multiple-choice questions cannot be combined with single-choice (Likert) questions in a quantified construct or used for comparison in the Comparisons tab in the analytics dashboard.

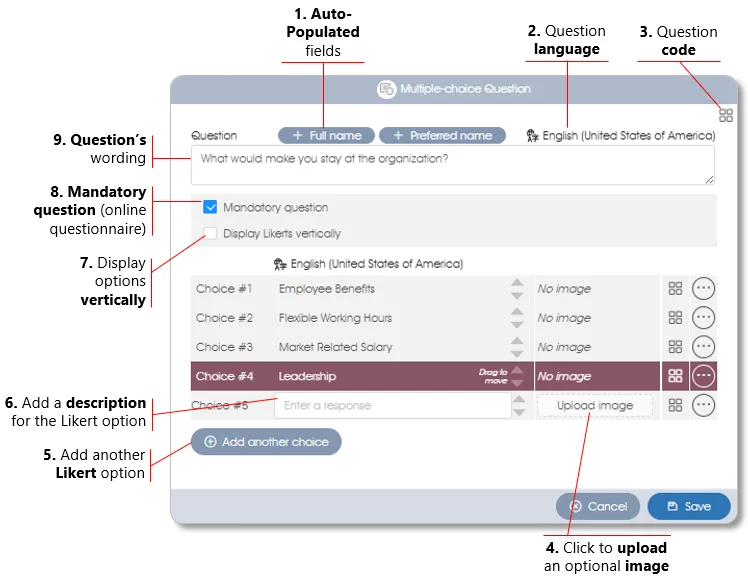
To add a multiple-choice question to a construct, select the destination construct and then click on the Multiple-choice toolbox function in the side panel or in the construct’s toolbox dropdown menu. A dialogue window with the following options will be displayed:
| 1. | Auto-populated fields (customization aids for assessments only) - inserted where required, these fields will be automatically filled with relevant information when the questionnaire is presented (see Auto-populated fields for more). |
| 2. | Question language - the language of this question. Models are created in a default language (usually English - United States of America) and may optionally have versions in additional languages (see Translating Questions and Constructs for more on this). |
| 3. | Question code – click on the icon to view or edit the unique code for the question. Question Codes can, inter alia, be used to link the question to a benchmark score where available. |
| 4. | Upload image – add an optional image to the multiple-choice option. |
| 5. | Add another Likert option – click on the button to add another option to the question. |
| 6. | Description for the option – add a short description for the multiple-choice option. |
| 7. | Display Likerts vertically - if selected, the options will be arranged vertically on the questionnaire. The default layout for options is horizontal, see the image above (at the top of this section). |
| 8. | Mandatory question – indicate whether a question should be mandatory (compulsory) in the online questionnaire. |
| 9. | Question wording – type in the wording of the multiple-choice question either as a statement or a question with a question mark. |
 |
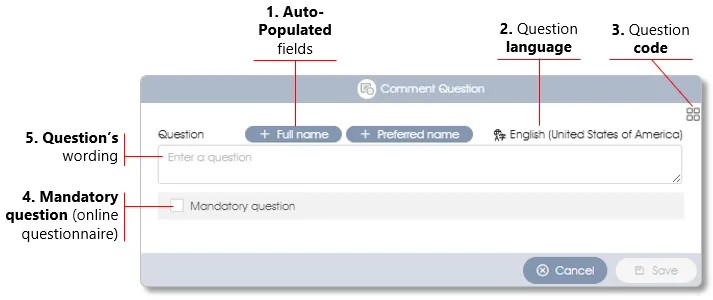
Add – or drag and drop – an open-ended (comment) question to a model construct |
Open-ended (comment) or qualitative question responses cannot be quantified or included in the calculations to determine the average score of a construct. Open-ended responses will, however, be combined and included as part of the text analytics function in the analytics dashboard and can be filtered per business unit and demographic attribute and analyzed by means of the word cloud and keyword search algorithm.
To add an open-ended question to a construct, select the destination construct and then click on the Open-ended toolbox function in the side panel or in the construct’s toolbox dropdown menu. Alternatively, click and drag the Open-ended toolbox function from the side panel and drop it on the construct where you would like to add the question. A dialogue window will come up:
| 1. | Auto-populated fields (customization aids for assessments only) - inserted where required, these fields will be automatically filled with relevant information when the questionnaire is presented (see Auto-populated fields for more). |
| 2. | Question language - the language of this question. Models are created in a default language (usually English - United States of America) and may optionally have versions in additional languages too (see Translating Questions and Constructs for more on this). |
| 3. | Question code – click on the icon to view or edit the unique code for the question. Question Codes can, inter alia, be used to link the question to a benchmark score where available. |
| 4. | Mandatory question – indicate whether a question should be mandatory (compulsory) in the online questionnaire. |
| 5. | Question wording – type in the wording of the open-ended question either as a statement or a question with a question mark. |
 |
Add – or drag and drop – an NPS (net promoter score) question to a model construct |
A net promoter score (NPS) question will be displayed as shown below in a questionnaire and will allow respondents to select only a single option in response to the question.

NPS questions measure the likelihood on a scale out of 10 that respondents (e.g. employees, customers) will recommend a company, a product, or a service to a friend or colleague.
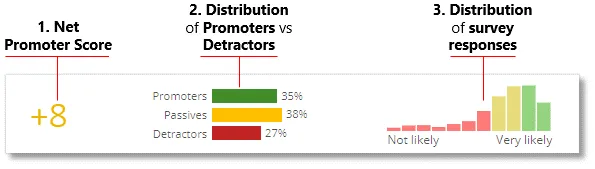
| 1. | Net Promoter Score – shows the calculated NPS score, with positive scores > 30 shown in via a green bar, < 30 in orange, and negative scores in red. |
| 2. | Distribution of Promoters vs Detractors – number (percentage) of respondents who selected responses that fall in one of the NPS categories. |
| 3. | Distribution of responses – number of respondents who selected each of the different NPS options when they completed the questionnaire. |
The score is expressed as the percentage of those who selected the 9 or 10 options ("Promoters") minus the percentage who selected the 6 or lower options ("Detractors"). Respondents who selected the 7 or 8 options are grouped as “Passives”.

To add an NPS question to a construct, select the destination construct and then click on the NPS question toolbox function in the side panel or in the construct’s toolbox dropdown menu. Please note that a NPS question can only be added to a non-quantified construct - it cannot be combined with other types of questions in a quantified construct. (See Multiple-choice question for more on the different settings).
 |
Add – or drag and drop – a single-option dropdown question to a model construct |
A Dropdown question will be displayed as shown below in a questionnaire and will allow respondents to select only a single option in response to the question.

Responses to single-option dropdown questions can be quantified and combined with other similar questions to calculate the average score for a construct in the analytics dashboard.
To add a dropdown question to a construct, select the destination construct and then click on the Dropdown question toolbox function in the side panel or in the construct’s toolbox dropdown menu. Alternatively, click and drag the Dropdown question toolbox function from the side panel and drop it on the construct where you would like to add the question. (See Multiple-choice question for more on the different question settings).
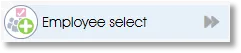 |
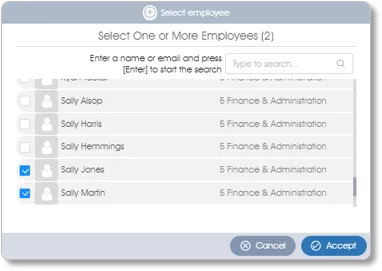
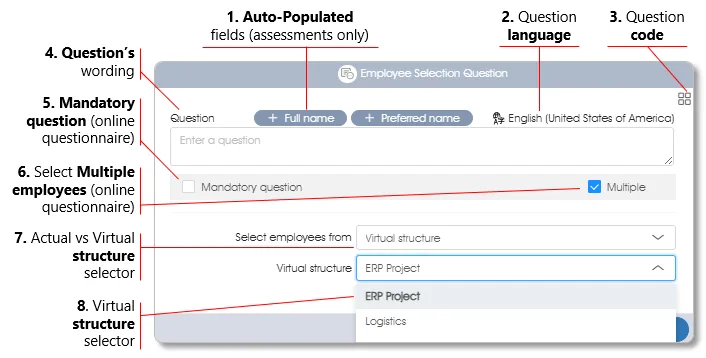
Add – or drag and drop – an Employee selector to a model construct |
A survey participant can select colleagues, from among the organization's employees defined in Manage Participants, who meet specified criteria via the Employee select question. The employee selector will be displayed with checkboxes in a questionnaire if multiple employees may be selected. A radio button will indicate the selected employee if the Employee select has been configured to accept the selection of a single employee.
 |
 |
Employee select survey responses will be combined and included as part of the text analytics function in the analytics dashboard, and can be filtered per business unit and demographic attribute and analyzed by means of the word cloud and keyword search algorithm (see Text Analytics by Employee Select for more).
| 1. | Auto-populated fields (customization aids for assessments only) - inserted where required, these fields will be automatically filled with relevant information when the questionnaire is presented (see Auto-populated fields for more). |
| 2. | Question language – the language of this question. Models are created in a default language (usually English - United States of America) and may have versions in additional languages (see Translating Questions and Constructs for additional information). |
| 3. | Question code – click on the icon to view or edit the unique code for the question. Question codes can, inter alia, be used to link the question to a benchmark score where available (see Indicator Analytics for more). |
| 4. | Question wording – as either a statement or a question complete with question mark, specify the criteria to be used by participants when selecting among their co-workers. |
| 5. | Mandatory question – indicate whether a question should be mandatory (compulsory) in the online survey questionnaire. |
| 6. | Multiple employees – check the box to indicate that multiple employees may be selected. If the Multiple box is left unchecked the selection of a second or subsequent employee will deselect the previously selected employee(s). |
| 7. | Actual vs Virtual structure – indicate whether the employee(s) will be selected from the organization's Actual structure or its Virtual Structure in Manage PARTICIPANTS. |
| 8. | Virtual structure selector – select which of the organization's Virtual structures will be used if Virtual Structure was selected (see 7. above). |
 |
Edit an existing model question |
To edit an existing question, select the question in the work area (it will be highlighted in burgundy) and then click on Edit question in the side panel toolbox function or in the question’s toolbox dropdown menu in the work area. A dialogue window with parameters relevant to the type of question being edited will open. Edit the parameters as required and click on the Save button to save the changes and close the dialogue window.
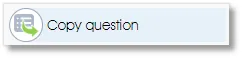 |
Make a copy of an existing model question |
Select a question (it will be highlighted in burgundy), and then click on the Copy question toolbox function in the side panel or in the toolbox dropdown menu in the work area. A dialogue window where you can confirm the copying of the question will open. Click on the OK button to save the question. An iteration number (#1) will be added to the question text – use the Edit question toolbox function to edit the text.
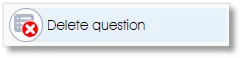 |
Delete a model question |
Select a question (it will be highlighted in burgundy), and then click on the Delete question toolbox function in the side panel or in the toolbox dropdown menu in the work area. A dialogue window will open where you can confirm the deletion of the question by clicking on the Delete button. The question will be removed from the work area.
| For more information, click on a sub-menu item at the top of the page⇑ or in the right margin⇒ |